In the world of online learning, keeping tabs on your progress is essential for achieving academic success. Blackboard offers multiple options to help you monitor your performance, stay organized, and take control of your learning experience.
This article will provide you with a step-by-step process on how to identify if Progress Tracking is enabled for your course and how to use this feature efficiently.
Progress Tracking
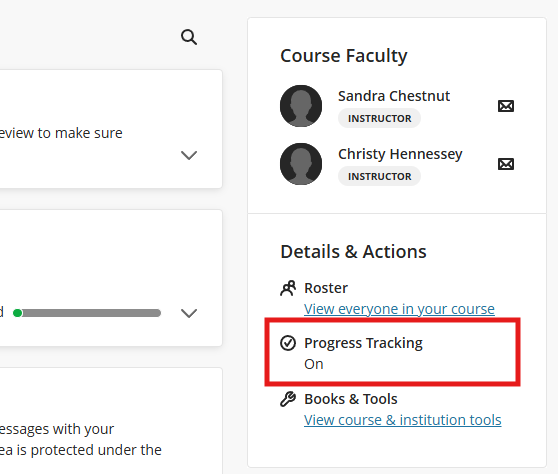
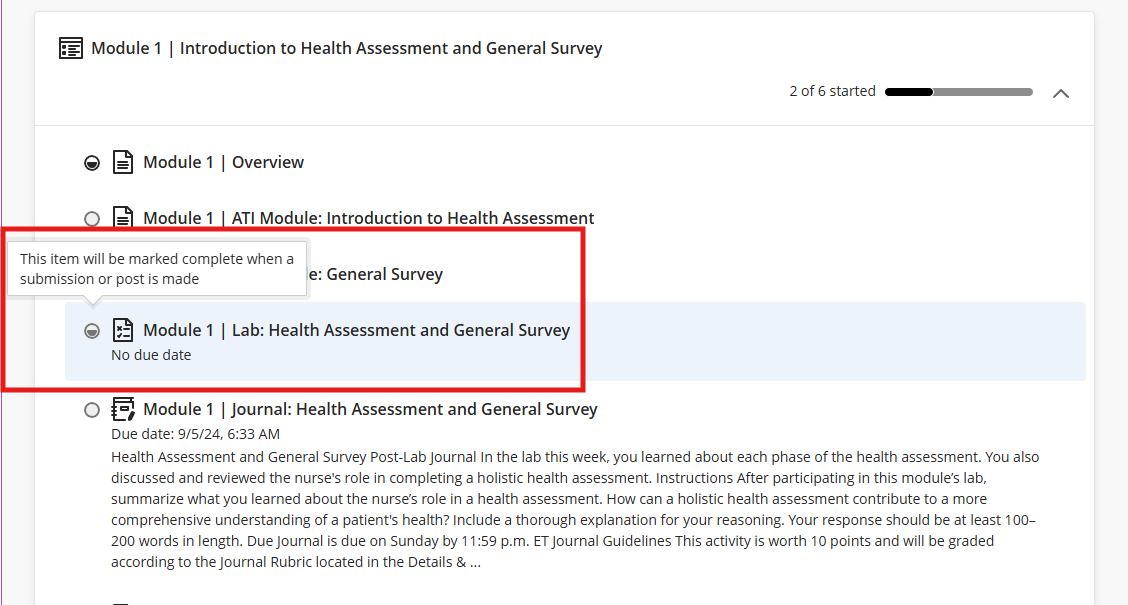
If your instructor has enabled progress tracking, you will see it in the Details & Actions section in the Course Content tab.
Step 1
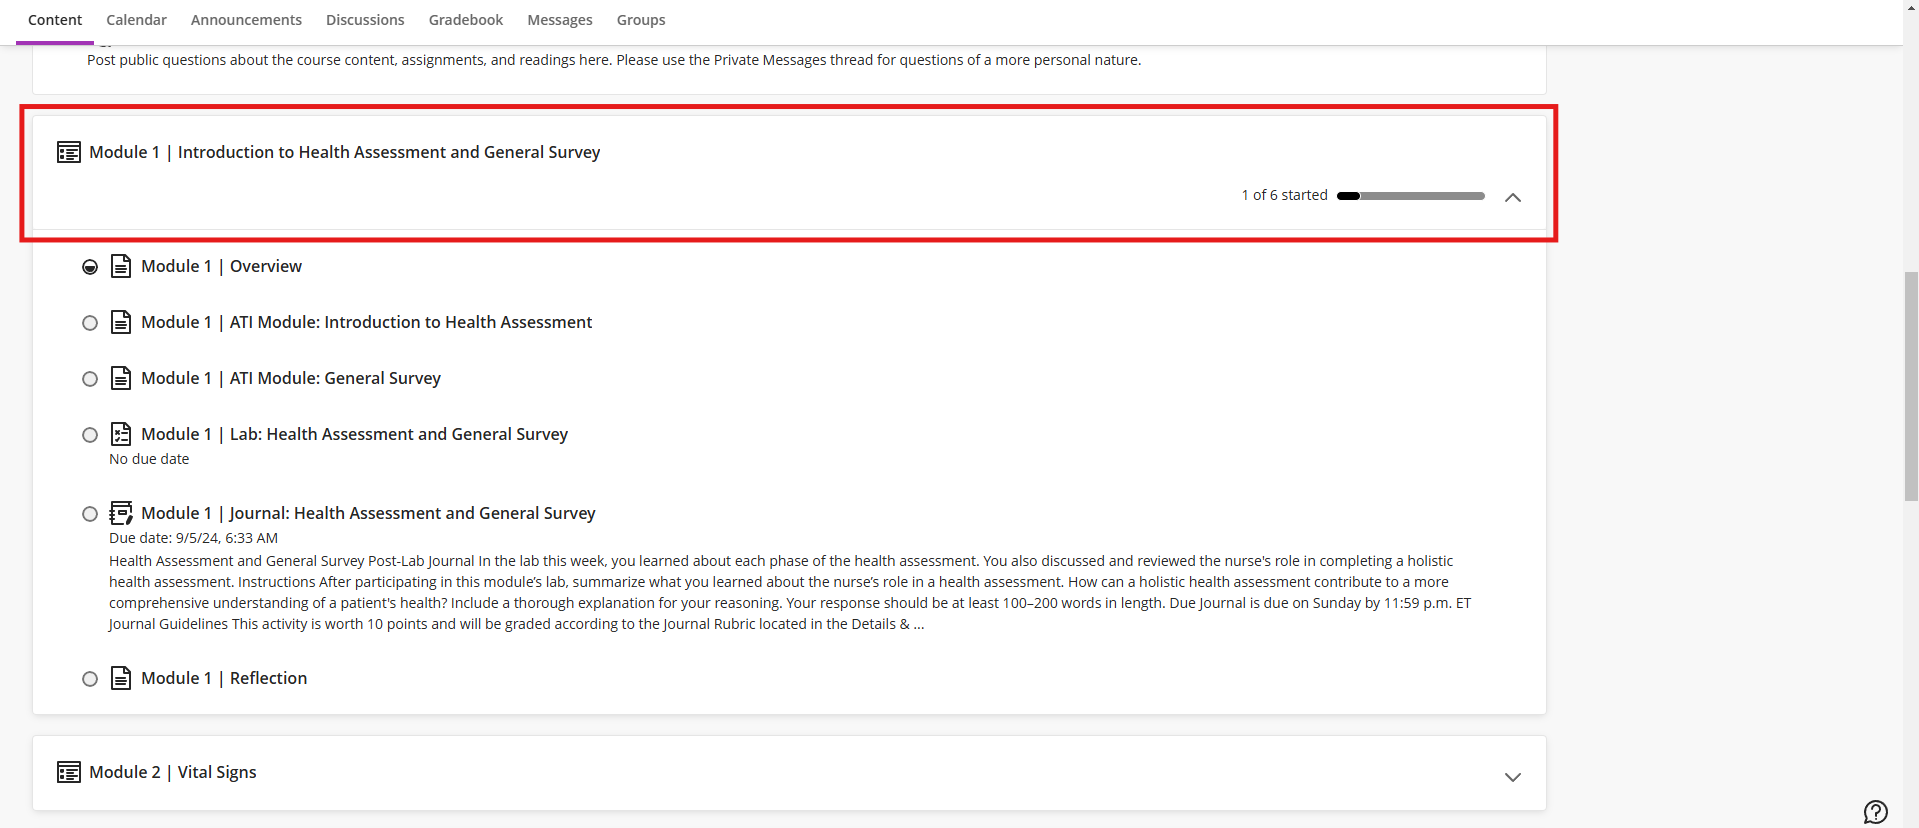
First, choose the module you wish to complete.
Step 2
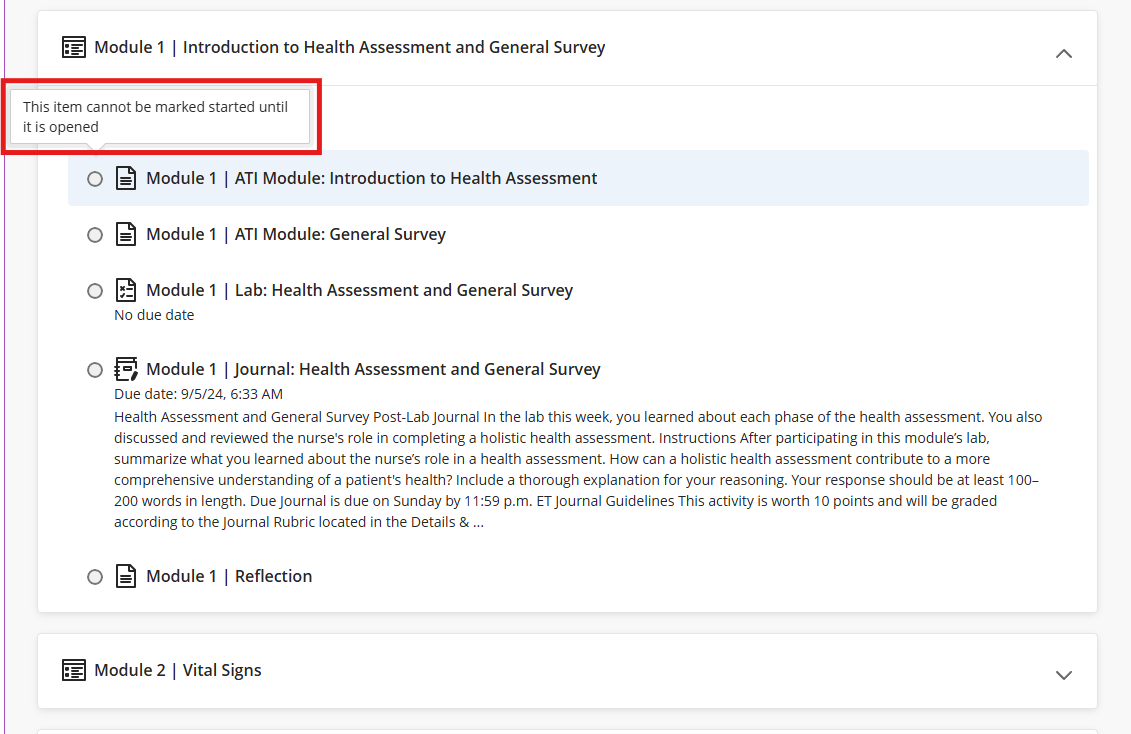
Next, choose the item you want to complete to mark it as started.
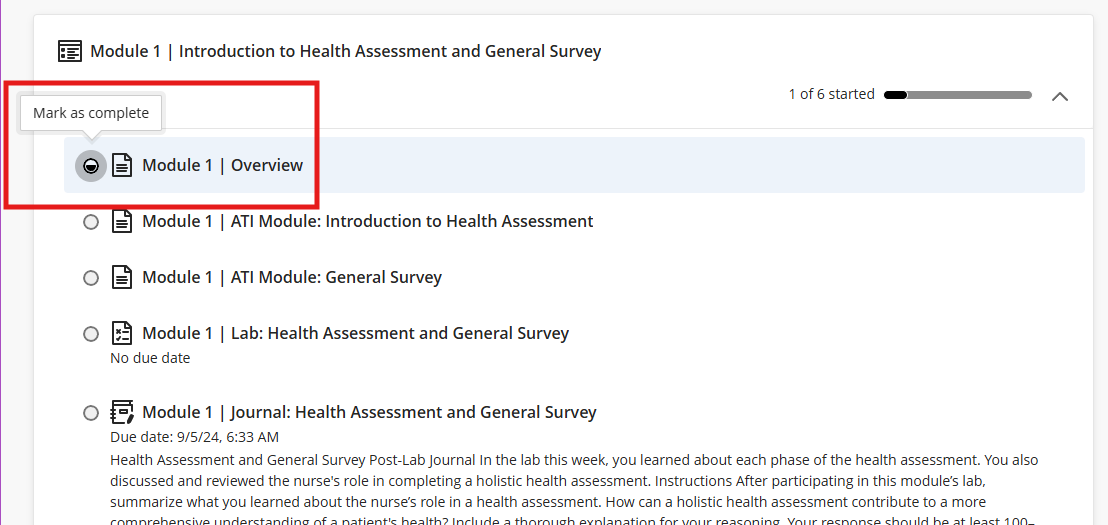
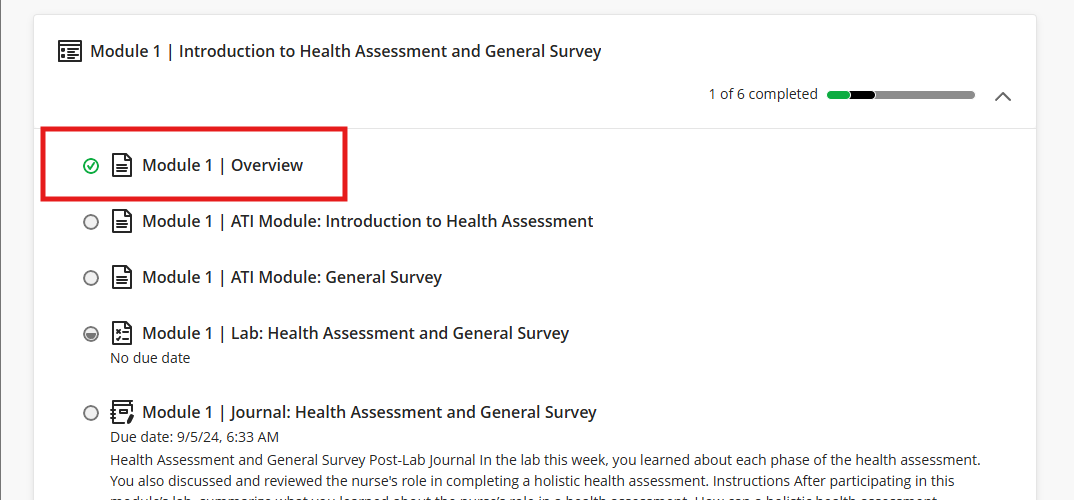
After you open an item, you will see the half-full circle logo (![]() ). Click on the logo to mark the item as complete.
). Click on the logo to mark the item as complete.
Items that require a submission will not be marked as complete until the submission is made. If the assessment has multiple attempts, the half-full circle logo (![]() ) will appear after every attempt is started.
) will appear after every attempt is started.
Step 3
Once an item is marked as complete or a submission is made, a checkmark logo (![]() ) will appear on that item.
) will appear on that item.
Progress Bar
The progress tracker below the module description shows how many items you have started (black bar) and completed (green bar).

If you feel like you need to re-visit an item later, you can mark it as started again by clicking on the checkmark logo (![]() ).
).


The module will show as Complete after every item is completed.
