Creating PDF Files
Note: The steps below will assist in guiding windows users.
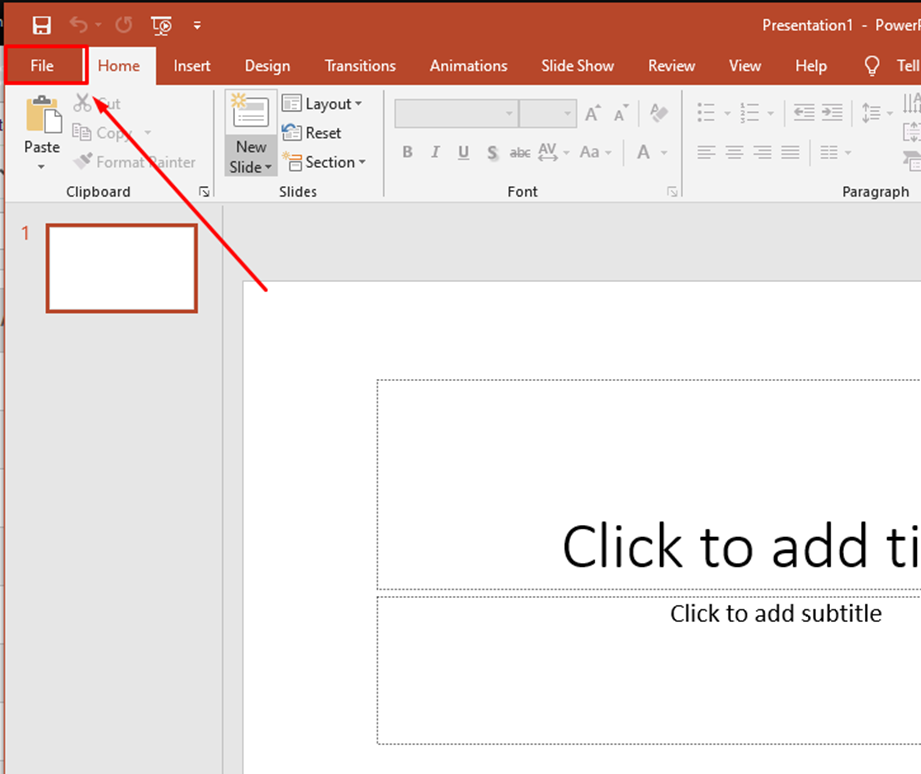
Step 1
Open your PowerPoint file and click on File > Save As
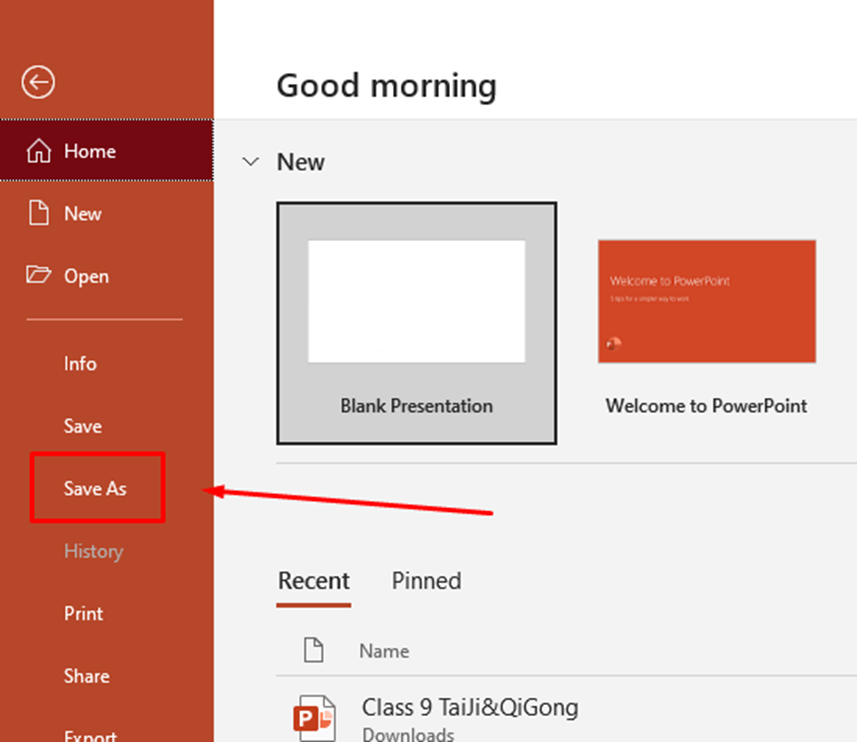
Step 2
Select a folder to save the file, enter the file name and change its format to PDF.
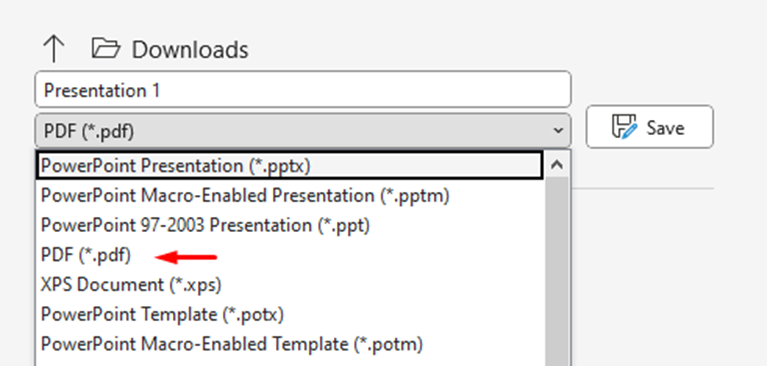
Step 3
If you’re done, click on the Save button. If you need to reduce the file size, you can create Handouts by clicking on More Options and then Options.
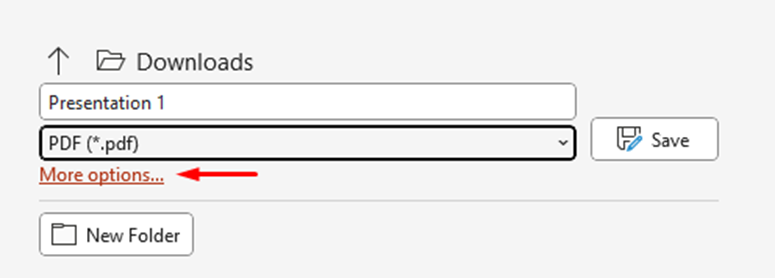

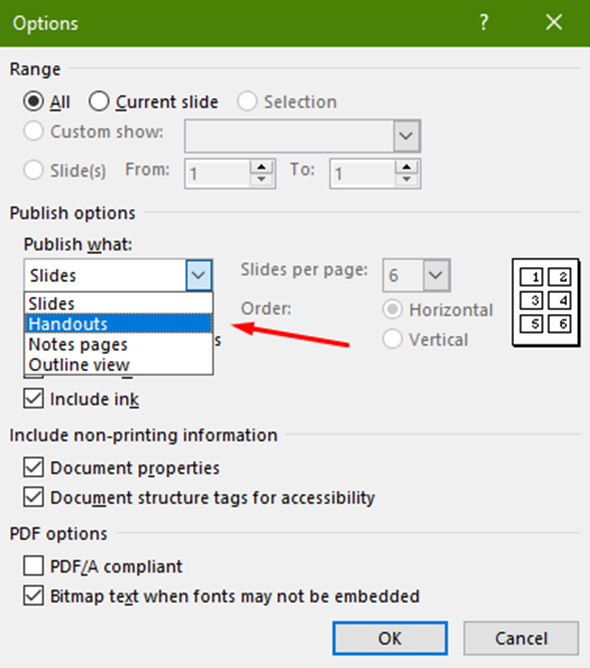
Note: Be aware that the “Options…” button appears after selecting PDF format on the dropdown menu above it.
Step 4
The default option will be “Slides” on the new window that pops up after clicking on Options; you want to change it to “Handouts.”
Step 5
Select the number of slides per page on the following dropdown menu in that window.
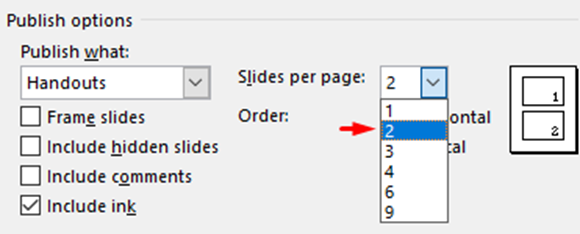
Note: We recommend using two slides per page to reduce the file size and keep the slides’ content legible.
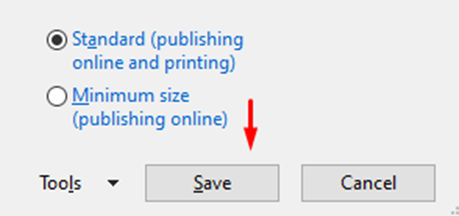
Step 6
After selecting the settings desired, click OK and then Save. 
Note for MacOS users:
To create Handouts from a Mac, you need to open the PowerPoint, go to “View,” and then hit “Handout Master.” You can edit your Handouts, save them and export them as PDFs. Another way to do it is by going to the “Print” option, changing the layout option to “Handouts,” selecting the number of slides you want per page, and then “Save as PDF.”