Sharing screen in Microsoft Teams is a powerful tool that allows you to hold presentations, share important notes or distribute useful audio files with colleagues.
In this guide, we’ll walk you through how to screen share in Teams on desktop or mobile devices.
Trouble with Teams sharing your camera, microphone or screen?
Occasionally, neither Microsoft Teams nor macOS prompts to share your camera, microphone and screen. That means Teams cannot access the camera and microphone and cannot screen share. Without these permissions in place, your Mac may show a spinning wheel in Teams. You can manually set up access by following these steps.
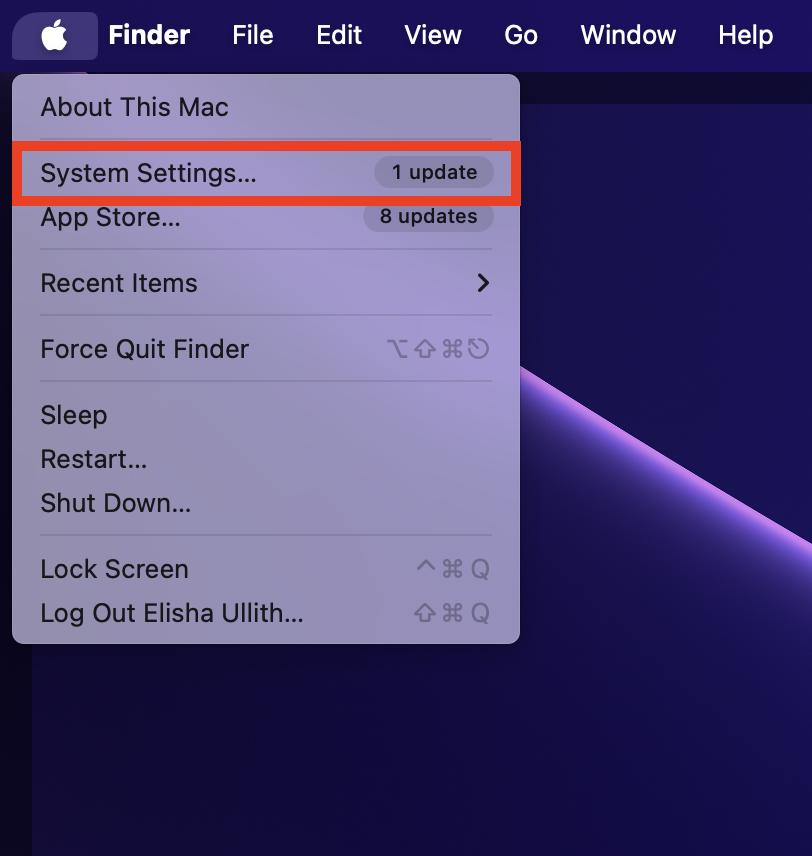
How to enable Privacy Settings on Mac
1. Click the Apple logo and select System Settings

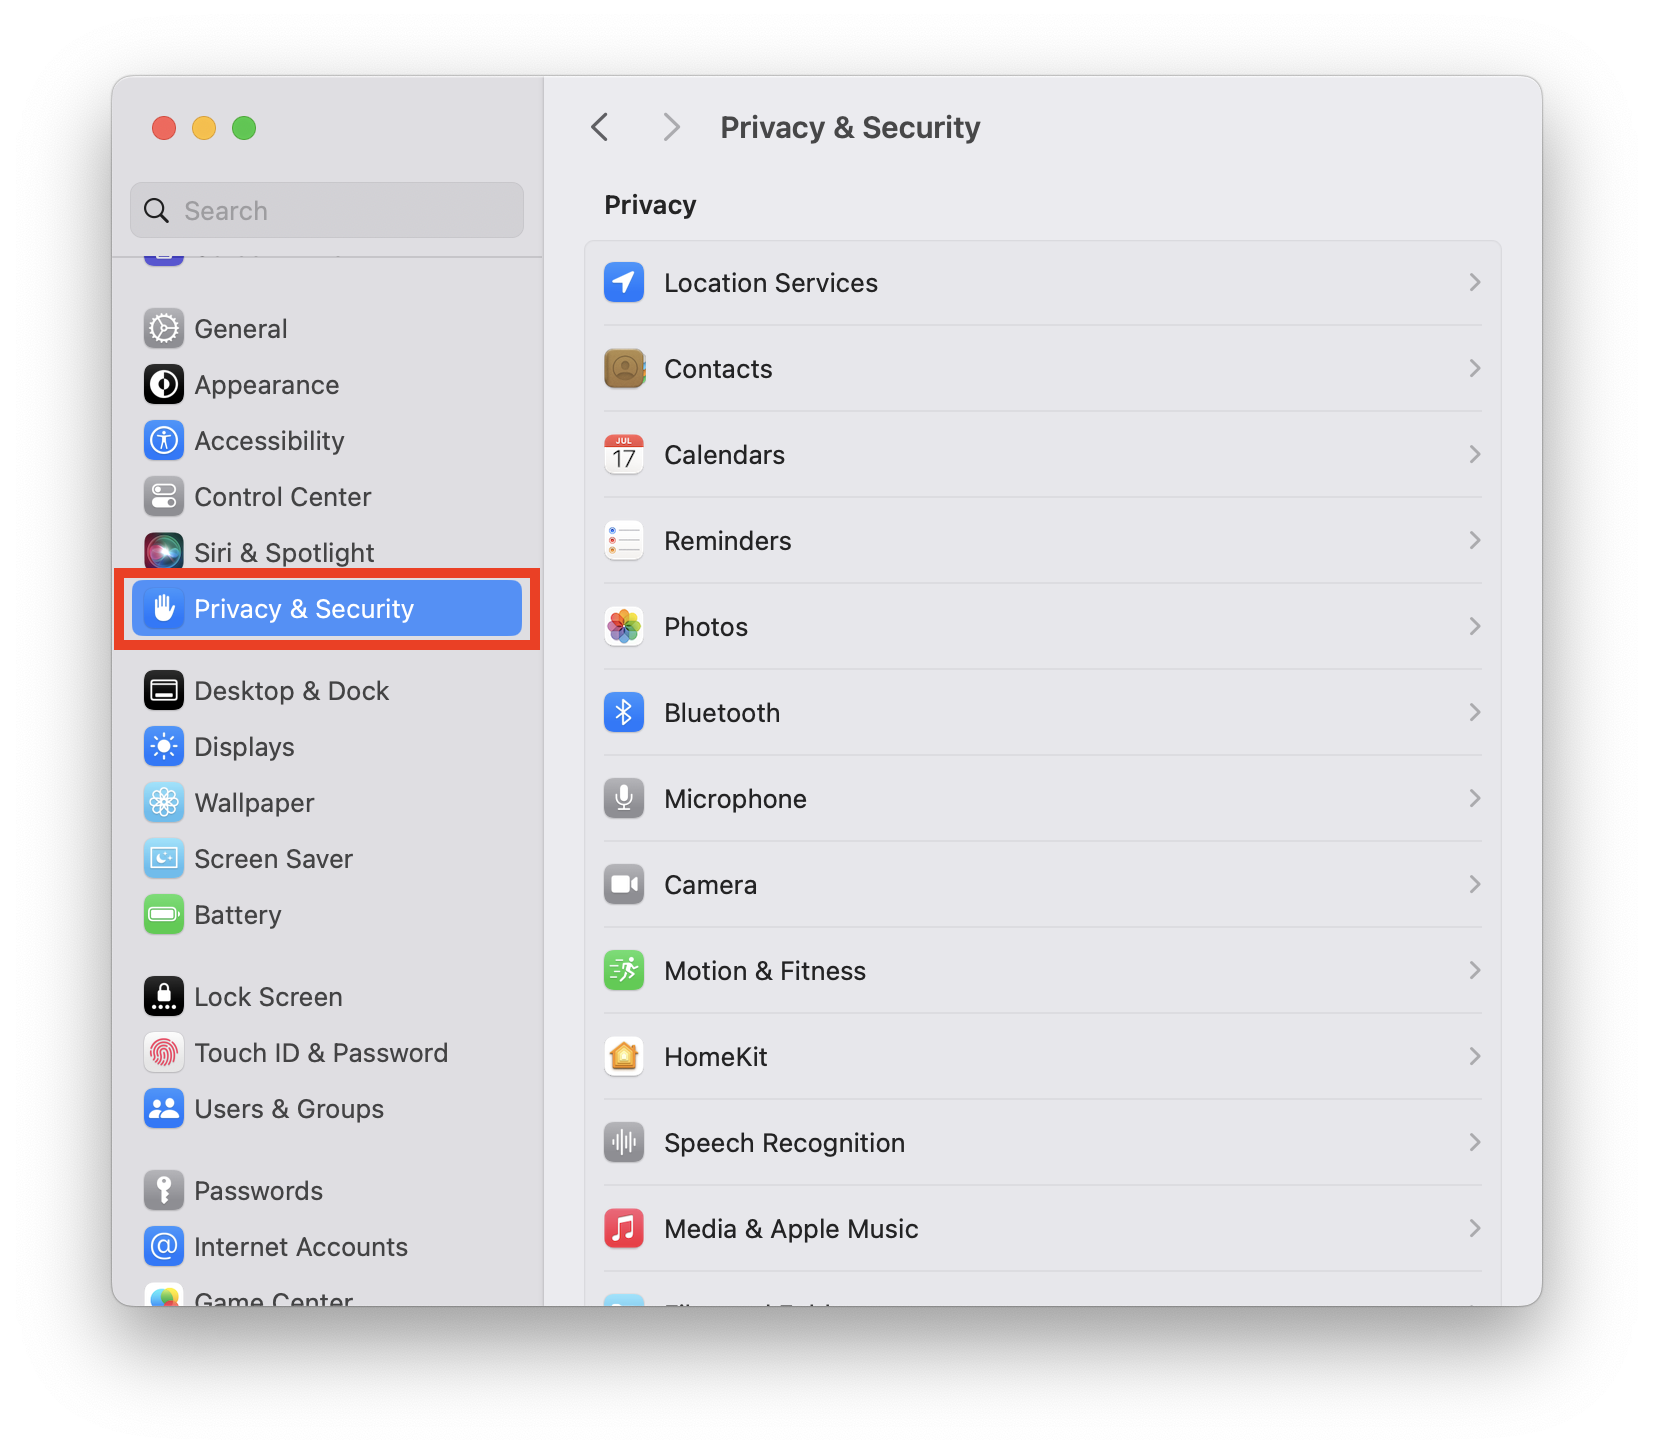
2. Click Privacy and Security
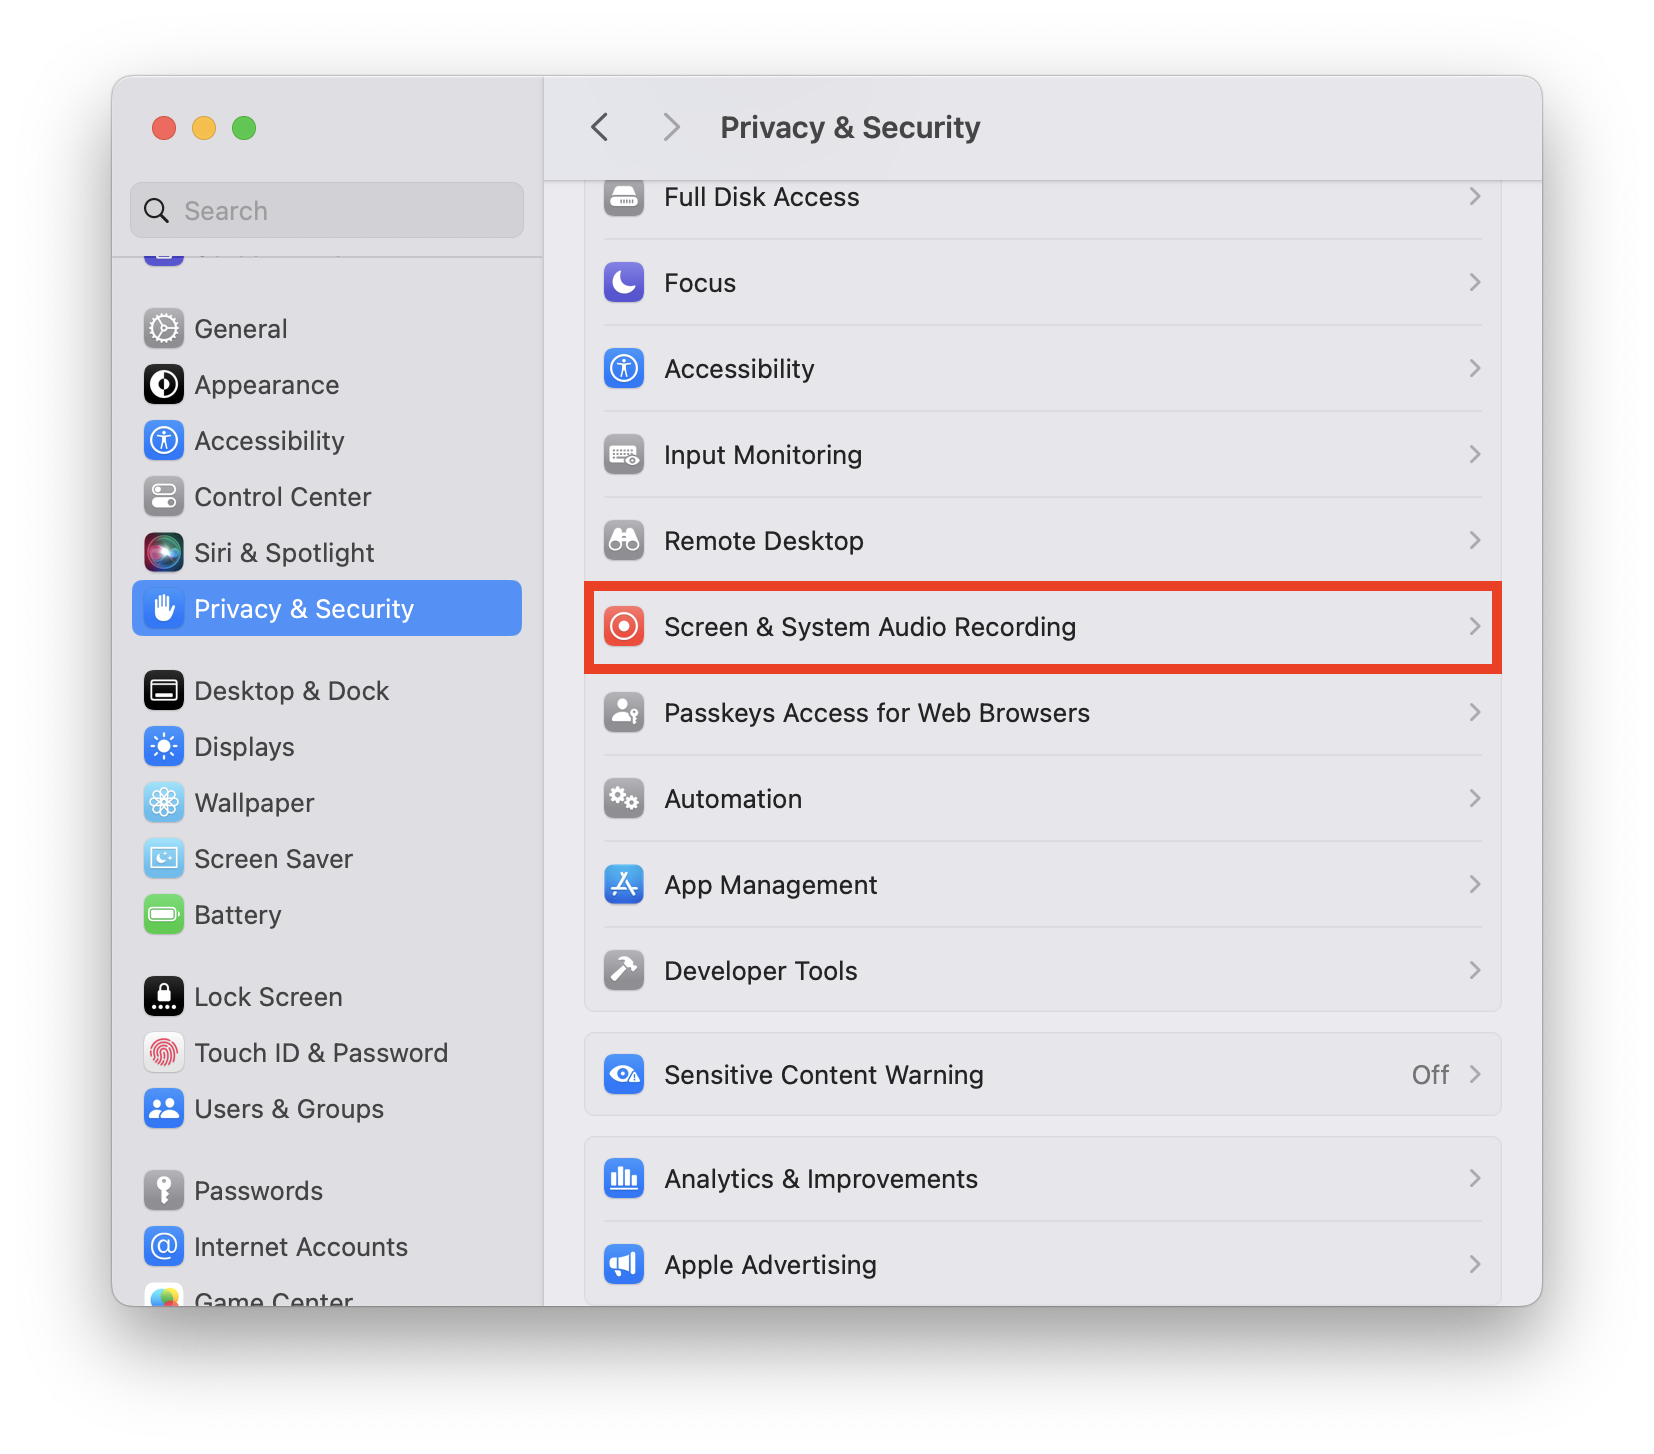
4. Enable the permission for Microsoft Teams. This will request authentication by using your password or Touch ID. Once completed, the checkbox should appear enabled.


How to Share your screen in Microsoft Teams using a Mac
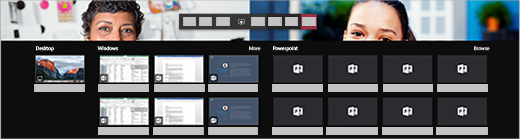
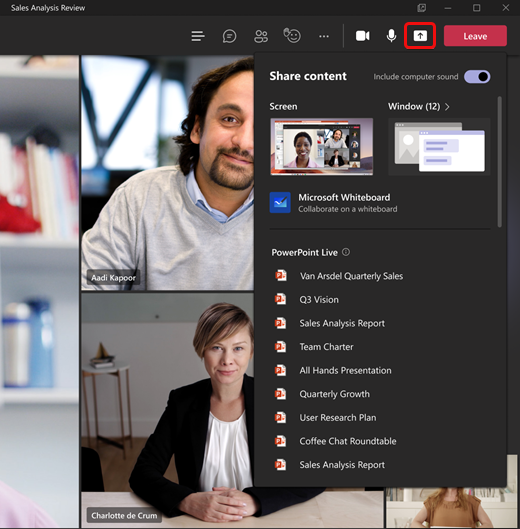
To share your screen in a meeting, select Share content  in your meeting controls. Then, choose to present your entire screen, a window, a PowerPoint file, or a whiteboard.
In Teams on the web, you’ll see the following when you select Share content :