How to download, install, and log in with SSO
Step 1: Download and Install Zoom
Download and install the “Zoom Client for Meetings” by clicking here and clicking the first download button.
Note: if you have issues installing, please check installation articles here and/or contact Zoom support.
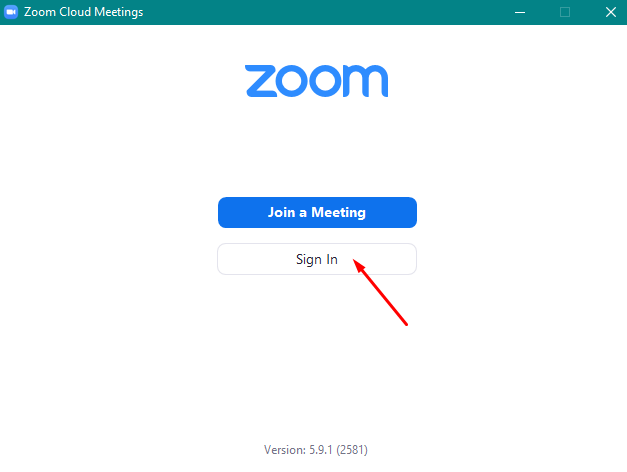
Step 2: Sign In
Click “Sign In”.
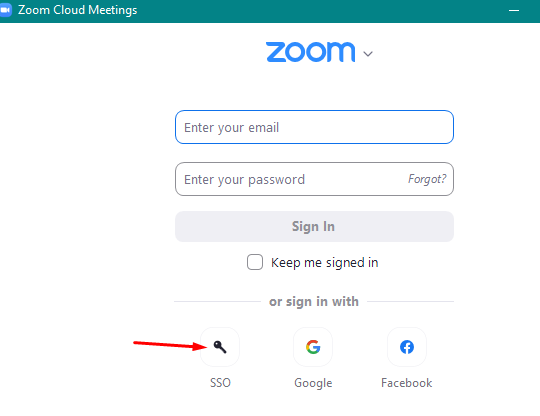
Step 3: Signing In with SSO
Click “Sign In with SSO“.
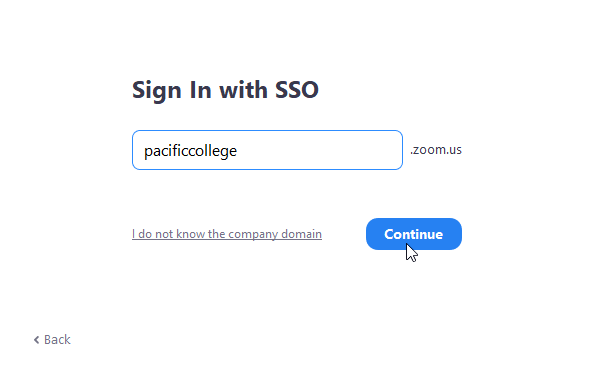
Step 4: Adding Pacific College’s Server Address
Type “pacificcollege” into the field.
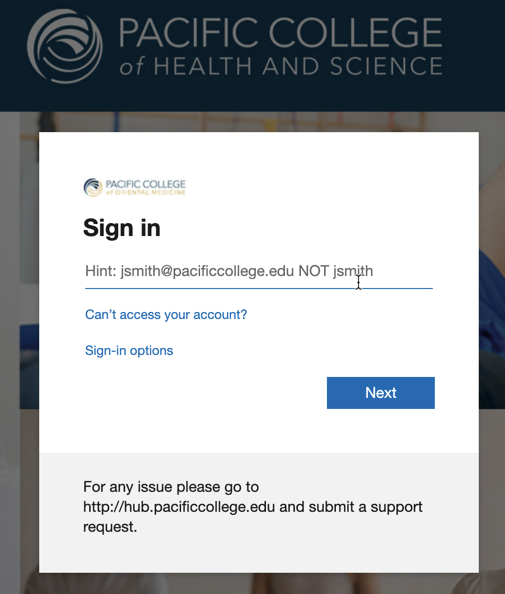
Step 5: Adding Credentials in Zoom
Use your Pacific College Email and Password to sign in.
Note: if you are already signed into Microsoft 365, then you will not see this step.
Step 6: Changing Status in Zoom
Zoom should now show you as logged in.
Note: If you already had a Zoom account before enrolling at Pacific College, you don’t need to sign out. Instead, you can add your PCHS account directly in the Zoom app. For step-by-step guidance, see “How to Switch from Your PCHS Zoom Account to a Personal Zoom Account.“
If you encountered any problems during this process, contact our tech support team for assistance. You can reach them by Clicking Here.